Raspberry Pi 3 Model B: First Look
Four years after the launch of the first Raspberry Pi, the Raspberry Pi Foundation comes up with the third generation of its series; Raspberry Pi 3 Model B. Raspberry Pi 3 will replace the Pi 2 in the current lineup, let us go through what’s new in terms of appearance and specifications, and then comparing the new Raspberry Pi 3 to the Pi 2 and B+.
What’s new
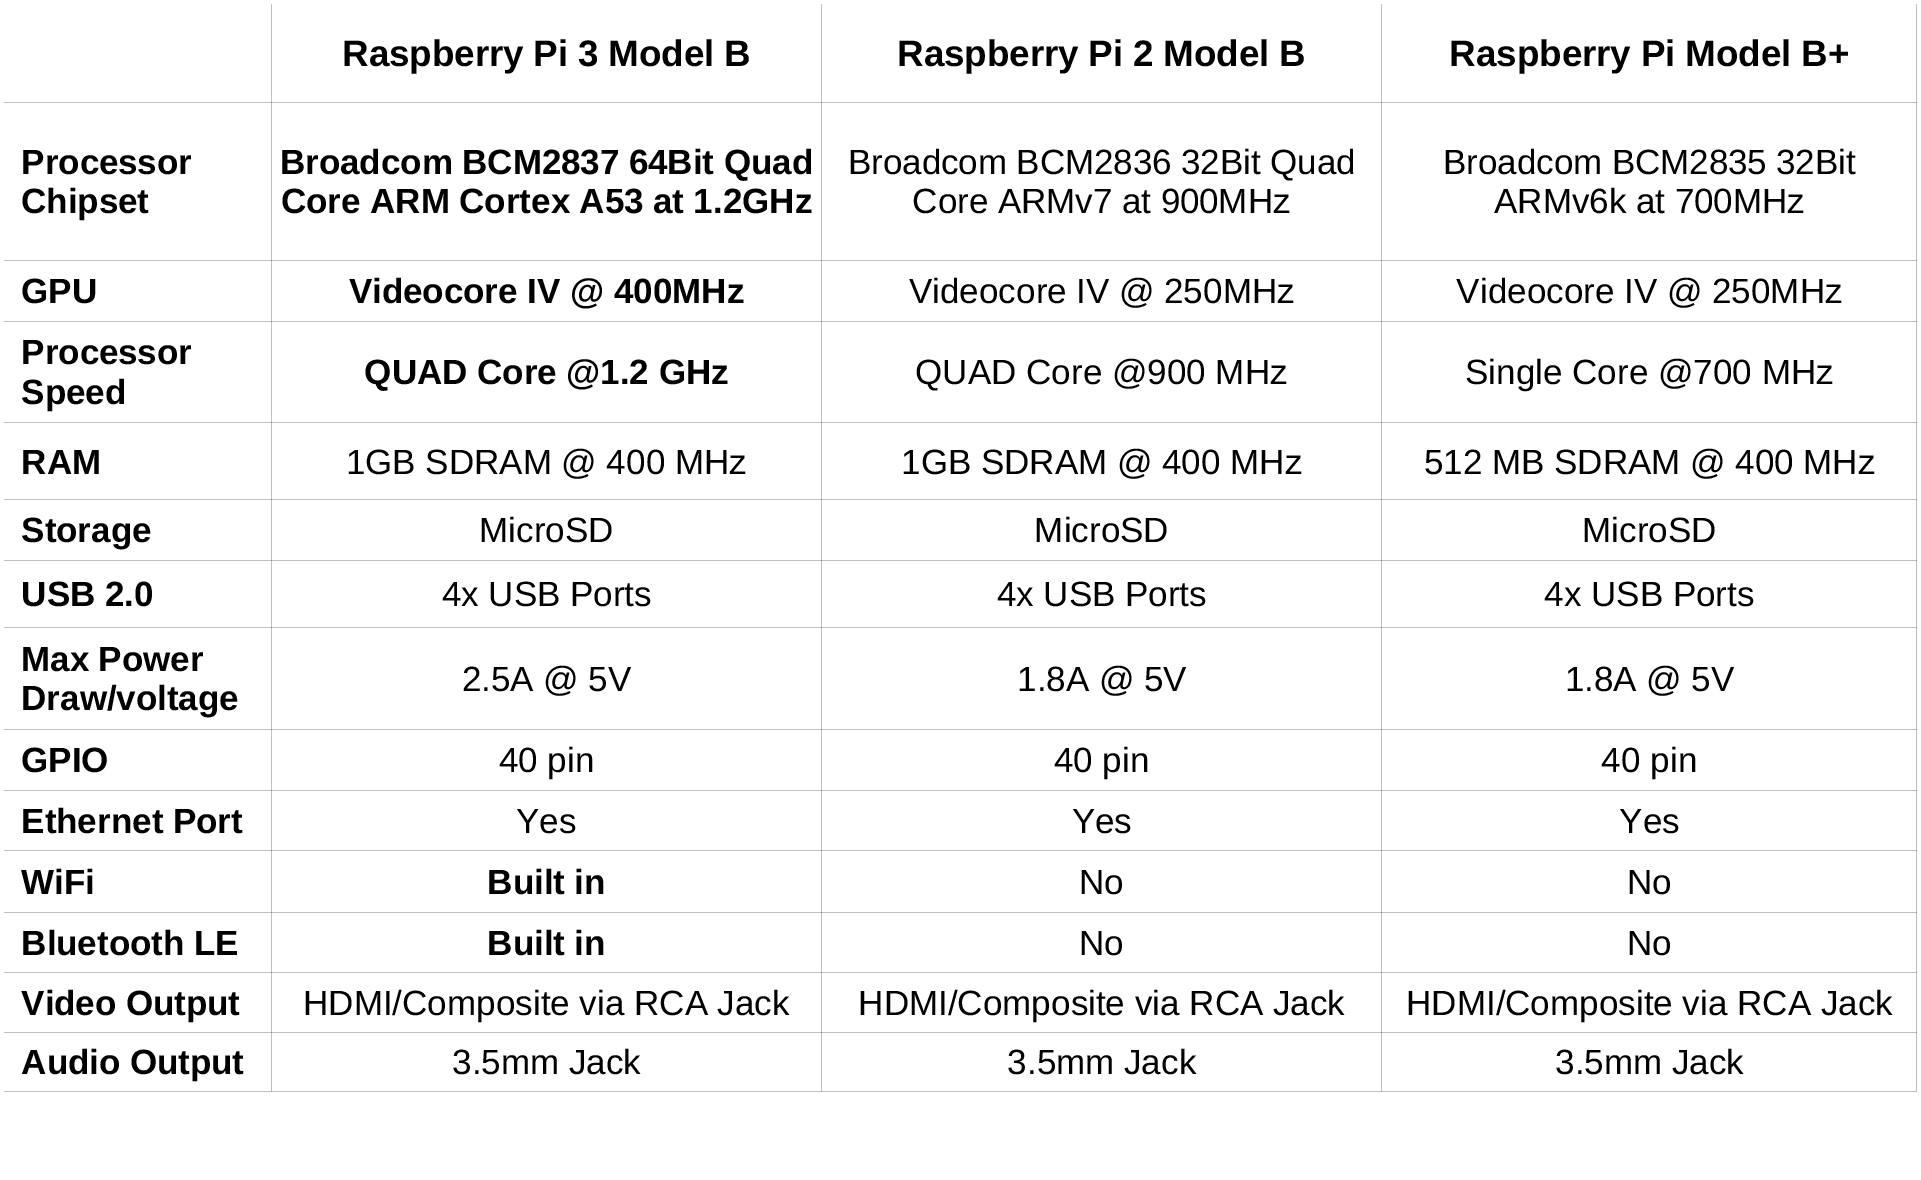
Outwardly, the changes in the Raspberry Pi 3 might seem modest but, performance wise , it shows an impressive jump in performance over last year’s model. The new SoC is the BCM2837, a quad-core 1.2GHz 64-bit ARMv8-A Cortex-A53 (up from a quad-core 900 MHz ARMv7 in the Pi 2) which, at face value, should represent a jump of about a 33% in performance. Video and 3D performance has also seen a bump with the VideoCore being clocked at 400MHz for video processing (up from 250MHz) and the 3D graphics processor running at 300MHz (up from 250MHz).
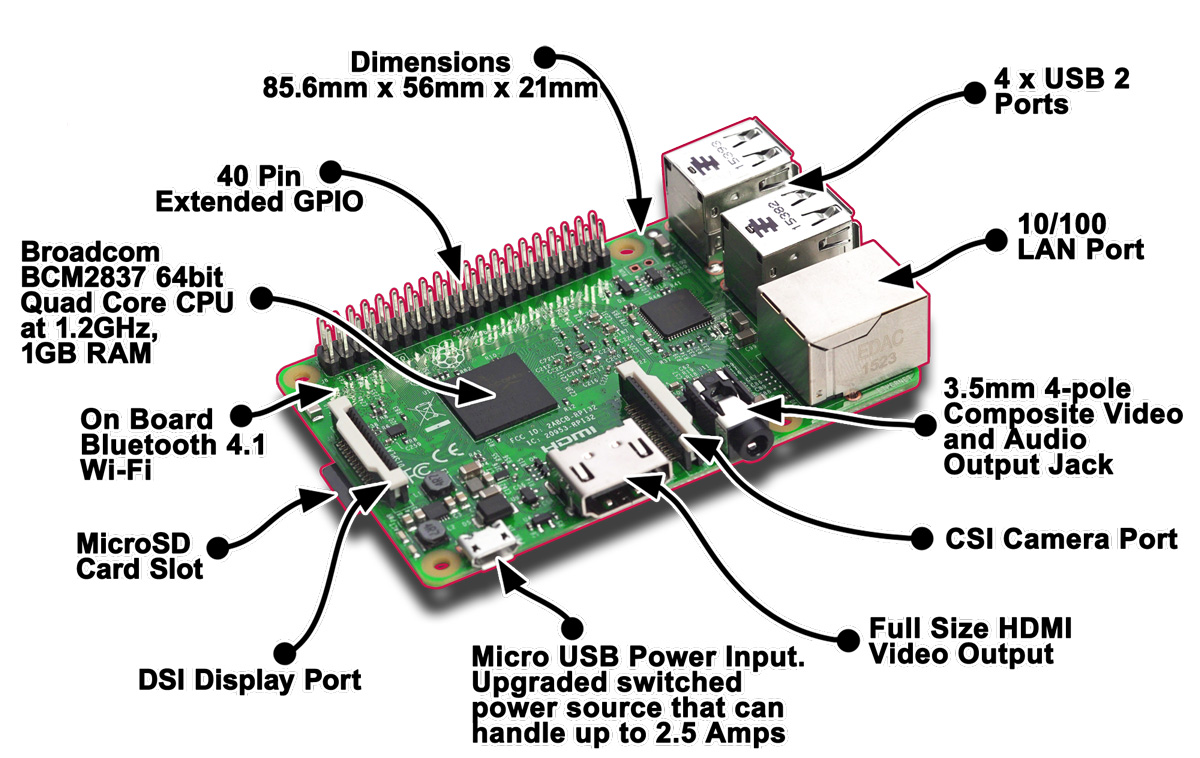
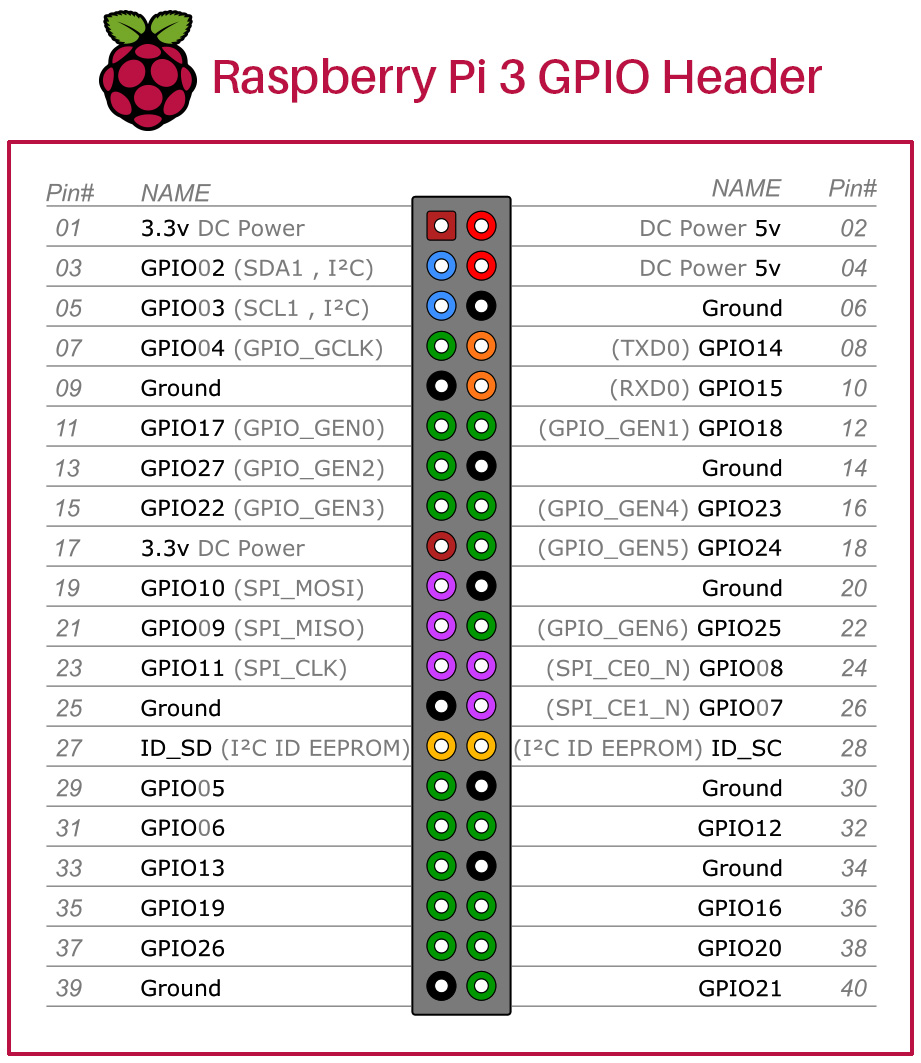
One of the most welcome changes will be the addition of onboard WiFi and Bluetooth. The WiFi is compatible with 2.4GHz 802.11 b/g/n networks and the Bluetooth 4.1 supports BLE (Bluetooth Low Energy) both are supplied by the BCM43438. Elsewhere, everything is pretty much the same as the Pi 2. There’s the 4 USB 2.0 ports, 10/100 ethernet, HDMI port, combined 3.5mm analog audio and composite video jack, CSI and DSI connectors for cameras and displays respectively, the microSD slot (which is now not spring-loaded), and the same 40 GPIO pins.
Comparison
Visually, you’d be forgiven for not being able to distinguish the Raspberry Pi 3 from the Raspberry Pi 2, but there are a couple of subtle changes.
 The combined WiFi/Bluetooth ceramic antenna package sits just above the DSI connector (the white rectangle) which means that the run header has moved across between the GPIO pins and the USB jacks like on the Pi Zero. The power and activity LEDs have also moved from top left to bottom left, again to accommodate the WiFi/Bluetooth, which may be a problem if your case uses light guides.
The Raspberry Pi logo has also moved from the left of the SoC to just above it.
Raspberry Pi 3 vs Pi 2: Connectivity
Those ports are the same as ever. You get four USB 2.0 ports (3.0 is above its pay grade), a Ethernet connector, full-size HDMI port and a microSD slot. This isn’t an ‘extra’ with a Pi. Whatever memory card you use acts as the hard drive here. We’re on a shoestring, remember?
Given their size, it’s impressive that these circuit board computers have the same connections as a large laptop of a few years ago. However, on the wireless side the Raspberry Pi 3 embarrasses the Pi 2. It has Wi-Fi and Bluetooth, where you’d need to use USB adapters to add that to a Pi 2. This is a massive benefit if you want to use the Pi as a mini media centre.
Summing up
The Raspberry Pi 3 offers a really nice jump in performance from the Pi 2, which itself was the biggest leap we’d seen so far in the life of Pi. The CPU performance is about 60% faster than the Pi 2. It’s worth remembering that as software is optimized for the new processor it should be able to flex its 64-bit credentials more and increase the performance gap further. Memory speed seems improved, although these benchmarks no doubt also benefit from the boost in CPU performance.
The on-board Wireless LAN and Bluetooth will undoubtedly be the biggest talking point though and, it shows very similar performance to the Official Raspberry Pi USB WiFi dongle, with transfer speeds of up to about 40MBit/sec. All in all, the Raspberry Pi 3 is a very worthy successor to the Pi 2. You should probably grab one!
Lets log on to Raspberry Pi 3
NOOBS Setup:
To get started with Raspberry Pi you need an operating system. NOOBS (New Out Of the Box Software) is an easy operating system install manager for the Raspberry Pi. If you have an SD card (8GB recommended), then you can download NOOBS for free and install it on your card.
Download
- Using a computer with an SD card reader, visit the Downloads page.
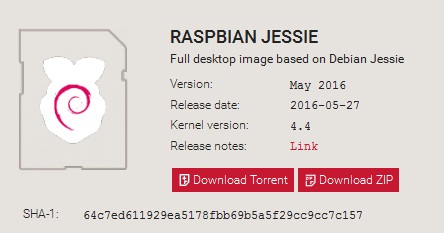
- Click on the
Download ZIPbutton under ‘RASPBIAN JESSIE’, and select a folder to save it to. - Extract the files from the zip.
Format your SD card
We recommend a minimum 8GB class 4 SD card. It is best to format your SD card before copying the NOOBS files onto it. To do this:
- Visit the SD Association’s website and download SD Formatter 4.0 for either Windows or Mac.
- Follow the instructions to install the software.
- Insert your SD card into the computer or laptop’s SD card reader and make a note of the drive letter allocated to it, e.g. F:/
- In SD Formatter, select the drive letter for your SD card and format it.
Drag and drop NOOBS files
- Once your SD card has been formatted, drag all the files in the extracted NOOBS folder and drop them onto the SD card drive.
- The necessary files will then be transferred to your SD card.
- When this process has finished, safely remove the SD card and insert it into your Raspberry Pi 3.
Leave a Reply
You must be logged in to post a comment.