CP210X Virtual Com Port(VCP) driver Installation
Many embedded devices communicate over the serial port connection as most modern computers lack a hardware serial port; USB adapters provide the serial interface. Here we are discussing how to open a serial connection to an embedded device on Windows XP.
The CP210X makes USB communication with a micro controller or serial device. The chip on the board translates the serial data coming from a device into USB data and vice-versa. It is widely used to upload firmware to the Various development boards, but it can communicate with any serial-enabled device

For a quick tutorial on CP210X Virtual Com Port (VCP) driver installation procedures for various CP2102 based products from rhydoLABZ like USB To RS232 Converter- CP2102 & much more… The CP210x USB to UART Bridge Virtual COM Port (VCP) drivers are required for device operation as a Virtual COM Port to facilitate host communication with CP210x products

The CP210x Manufacturing DLL and Runtime DLL have been updated and must be used with v6.0 and later of the CP210x Windows VCP Driver. Application Note Software downloads affected are AN144SW.zip, AN205SW.zip and AN223SW.zip. If you are using a 5.x driver and need support you can download archived Application Note Software.
Driver Installation![]()
You will need to download the appropriate drivers for your system. Currently, drivers are available for the following systems:
- Windows
- MacOS
- Linux
- Android
You can find the most up-to-date drivers for your system here, from Silicon Labs.
Installing USB Driver in Windows![]()
Download and unzip the drivers. Plug in the breakout board to your computer via a USB A-to-B cable. Windows will attempt to install the driver software, but you may need to guide it the proper driver location of the unzipped files.
If for whatever reason you don’t get the option to choose the driver location, you can manually install the drivers using the following steps.
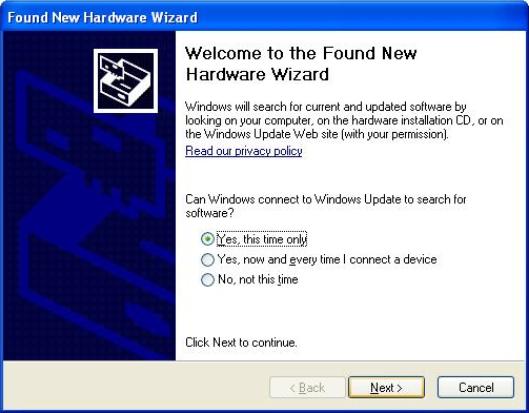
- Step 1: Connect the USB To RS232 Converter, we may receive a message in the Task bar as shown below

- Step 2: A window appears for installing the driver, click ‘Next‘ to proceed
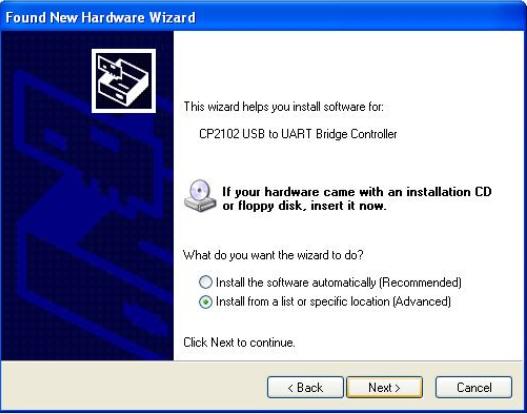
- Step 3: Select the option from the window opens for installing
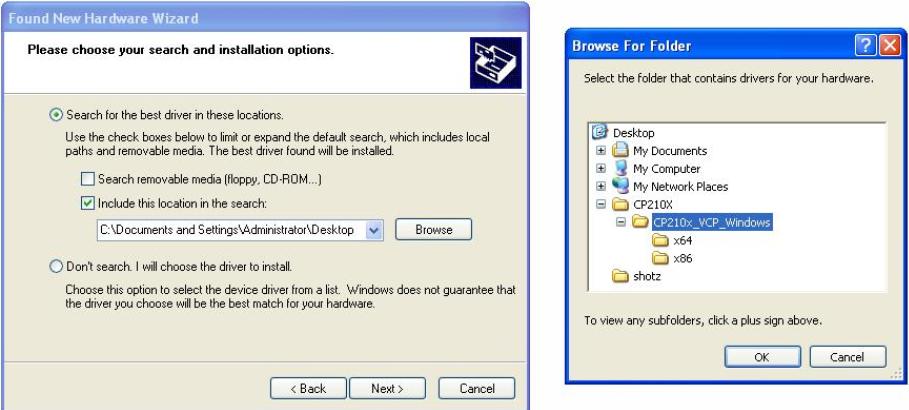
- Step 4: Browse for selecting location for the driver click ‘OK‘ and select ‘Next‘
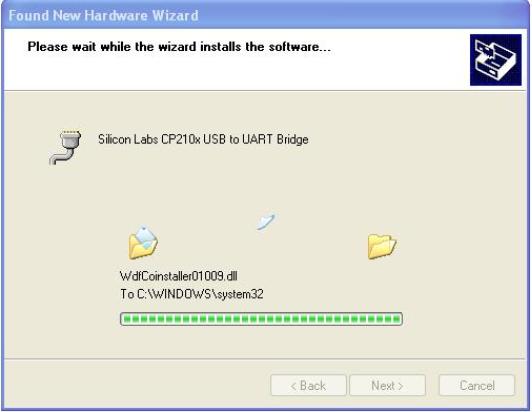
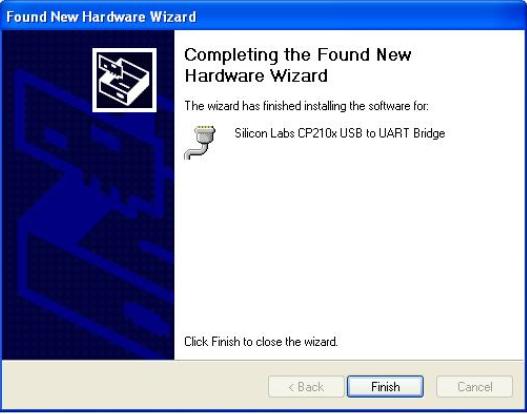
- Step 5: Wait for installation
- Step 6: Click ‘Finish‘ to complete the installation of USB To RS232 Converter
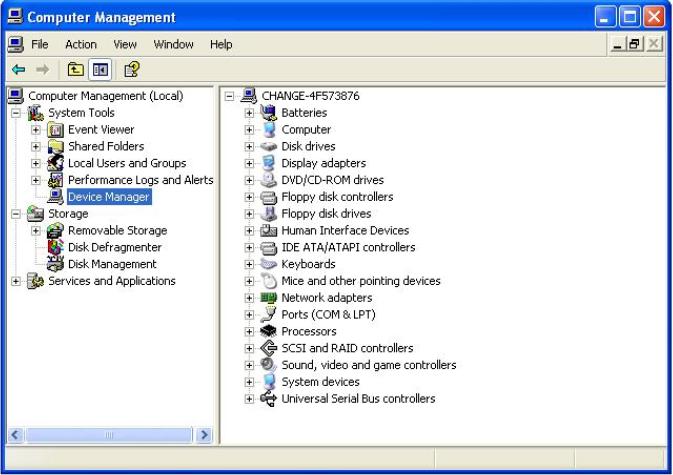
- Step 7: Navigate to your Device Manager window. For that right-click on the My Computer.

- Step 8: Select the Device manager as shown below
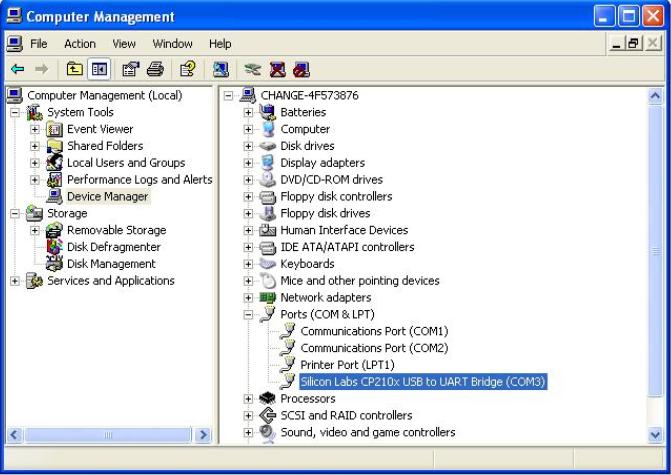
- Step 9: Select ports as shown below. Now you may see the communication ports with the PC

- Step 10: Thus found the communication port for USB To RS232 Converter as shown below.
Resources![]()
- Software
How to Buy?![]()
click here to buy rhydolabz USB To RS232 Converter- CP2102
Support![]()
Please share your ideas with us, visit our forum for discussion
Leave a Reply
You must be logged in to post a comment.