LPC2148 – USB HID
The internal USB of LPC2148 has P0.26 & P0.27 as D+ & D- lines respectively and has the following specifications
- Fully compliant with USB 2.0 Full Speed specification
- Supports 32 physical (16 logical) endpoints
- Supports Control, Bulk, Interrupt and Isochronous endpoints
- Scalable realization of endpoints at run time
- Endpoint Maximum packet size selection (up to USB maximum specification) by software at run time
- RAM message buffer size based on endpoint realization and maximum packet size
- Supports Soft Connect feature and Good Link LED indicator
- Supports bus-powered capability with low suspend current
- Support DMA transfer with the DMA RAM of 8 kB on all non-control endpoints (LPC2146/8 only)
- One Duplex DMA channel serves all endpoints (LPC2146/8 only)
- Allows dynamic switching between CPU controlled and DMA modes (available on LPC2146/8 only)
- Double buffer implementation for Bulk & Isochronous endpoints
The USB port on the mini development board can be used in 2 ways
- For UART0 communication via CP2102
- For using internal USB of LPC2148
In both cases, note the positions of resistors shown in the following images
For UART0 communication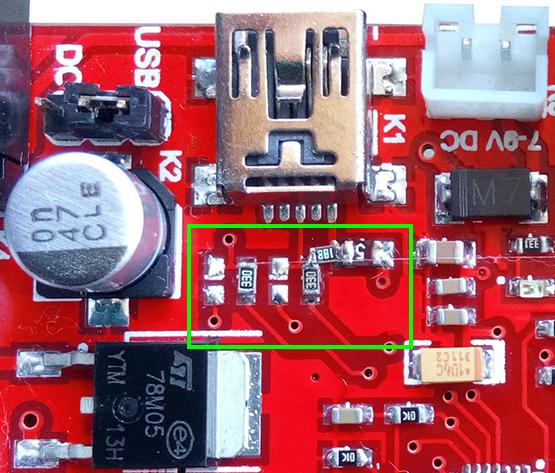 For internal USB
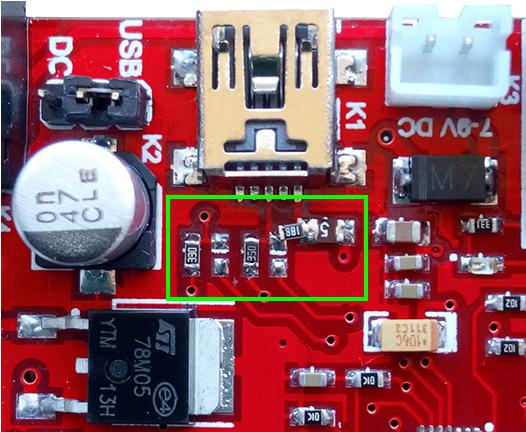
Using the USB HID library from Keil (click here to download), the mini development board can be turned into an HID compliant device. Initially generate a library using the Human Interface Device (HID) program from Keil and use the library to create application. Include the library in the application program. Now when the board is interfaced to PC, it will be detected as an HID compliant device.
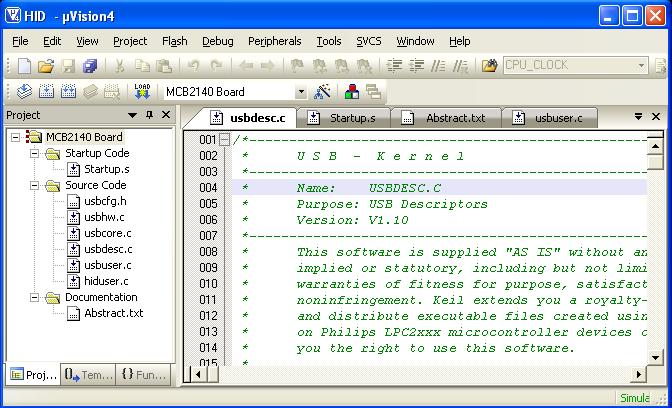
- Step 1: Open the project “HID” in the application folder
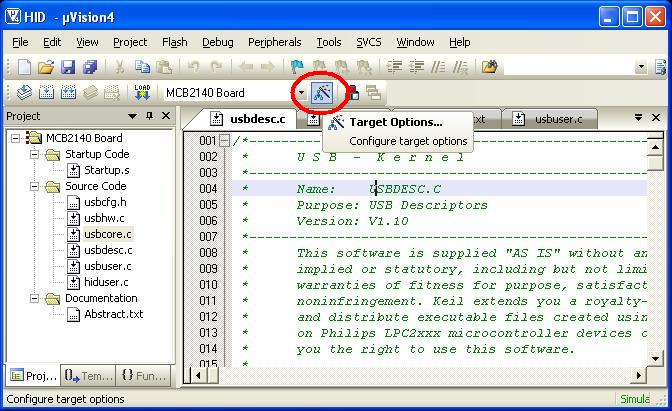
- Step 2: To set target file options, use the icon on ‘Build toolbar’ or select Project > Options for Target ‘Target 1′
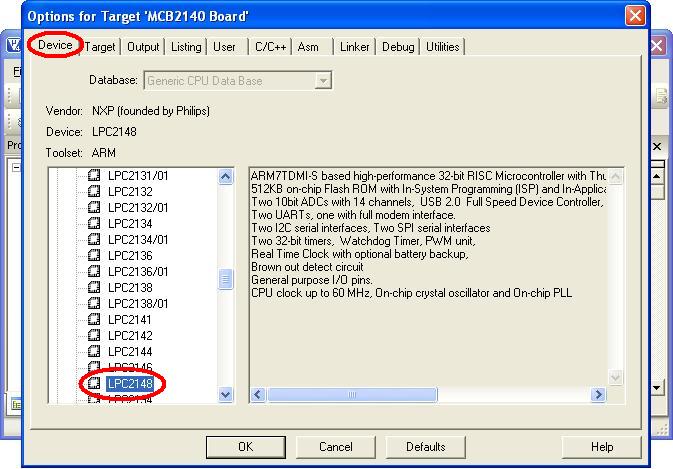
- Step 3: Ensure that the target device is selected as LPC2148 under Device tab
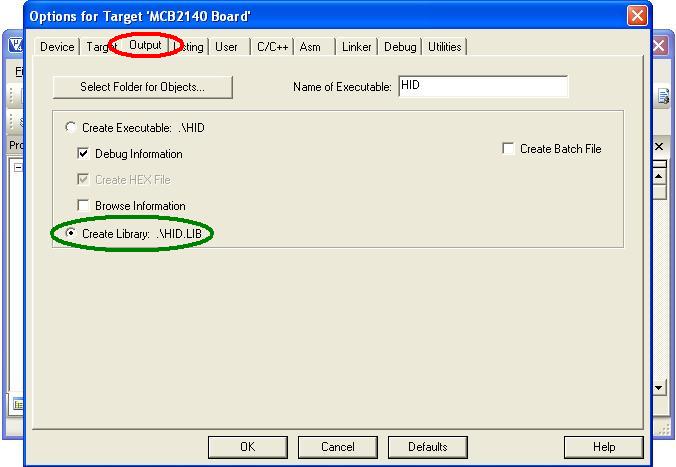
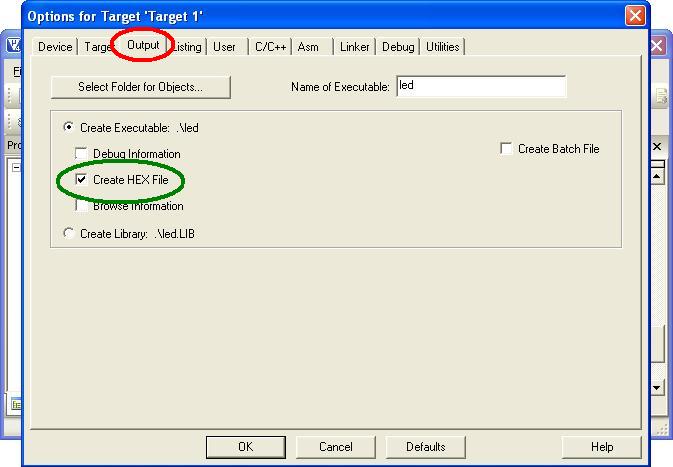
- Step 4: Under Output, select Create Library option (encircled in green) and click OK.
- Step 5: Build the project
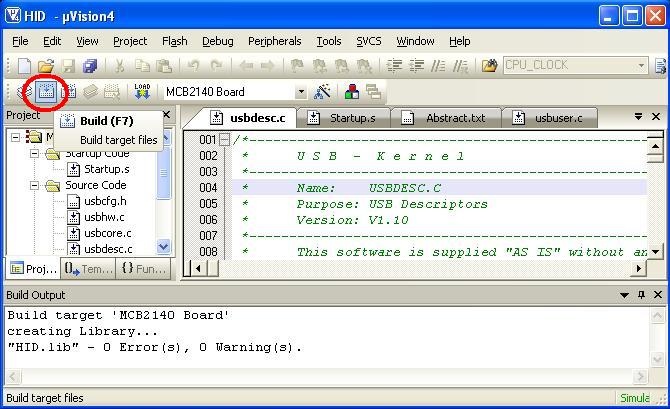
This creates HID library with .lib extension (marked in red) in the project folder.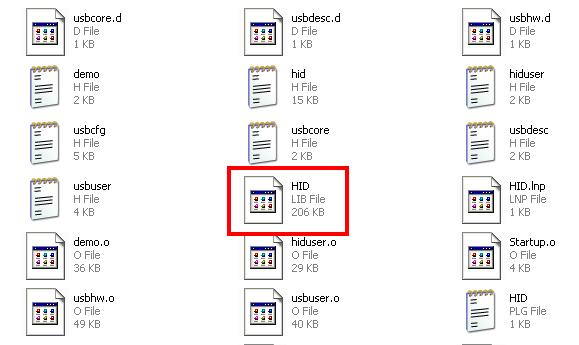
- Step 6: Create a new project and copy the library file HID.lib to the project folder. Along with the c file, add the library HID.lib. In the project workspace, simply create a new group called “Library”. Right-click on the folder and click on “Add files to Group Library”. Under files of type, select *.lib files and then select HID.lib.

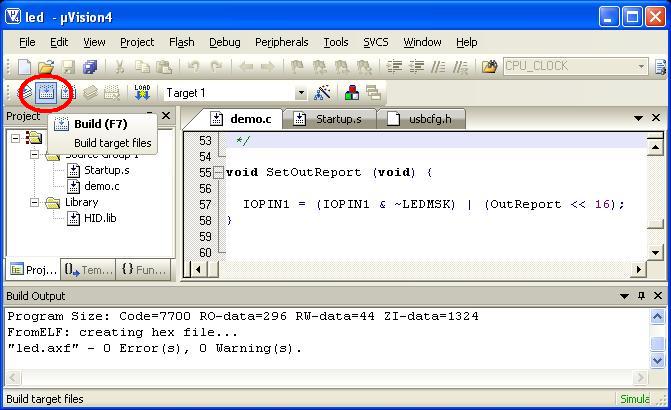
- Step 7: Select Target Options as shown in step 2. Under Output, select Create HEX file option and click OK.
- Step 8: Build the project to generate hex file in the folder
Flash the generated hex file into the controller and disconnect the board. Again connect the board to PC via USB port and check device manager. You can see that the board gets detected as USB HID compliant device.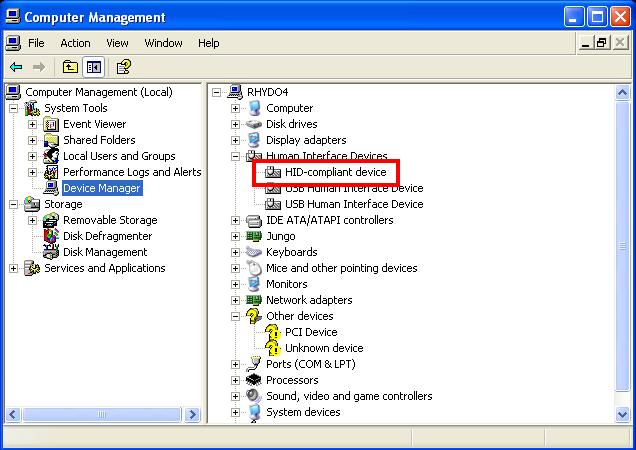
Note:
If your mini development board is detected as HID compliant device, then it is not possible to flash the code through USB. So use serial port for programming.
Topics related to ARM LPC2138/48 Mini Development Board![]()
- ARM LPC2138/48 Mini Development Board – Overview
- ARM LPC2138/48 Mini Development Board – LED Interfacing
- ARM LPC2138/48 Mini Development Board – LCD Interfacing
- ARM LPC2138/48 Mini Development Board – UART0 Interfacing
- ARM LPC2138/48 Mini Development Board – UART1 Interfacing
- ARM LPC2138/48 Mini Development Board – Switches Interfacing
- ARM LPC2138/48 Mini Development Board – BUZZER Interfacing
- ARM LPC2138/48 Mini Development Board – POT Interfacing (ADC)
- ARM LPC2138/48 Mini Development Board – Temperature Sensor Interfacing(ADC)
- ARM LPC2138/48 Mini Development Board – Interfacing Servo motor
- ARM LPC2138/48 Mini Development Board – Internal Real Time Clock (RTC)
- ARM LPC2148 Mini Development Board – USB Interfacing (Human Interface Device)
Resources![]()
- Softwares
- Datasheets
How to buy?![]()
- Click here to buy rhydoLABZ ARM LPC2129 Development board-Mini
- Click here to buy rhydoLABZ ARM LPC2138 Development Board-Mini
- Click here to buy rhydoLABZ ARM LPC2148 Development Board-Mini
Support![]() Please share your ideas with us, visit our forum for discussion
Please share your ideas with us, visit our forum for discussion
Leave a Reply
You must be logged in to post a comment.